Building a Window Herb Box: Materials, Step-by-Step Method, Variations, and Troubleshooting
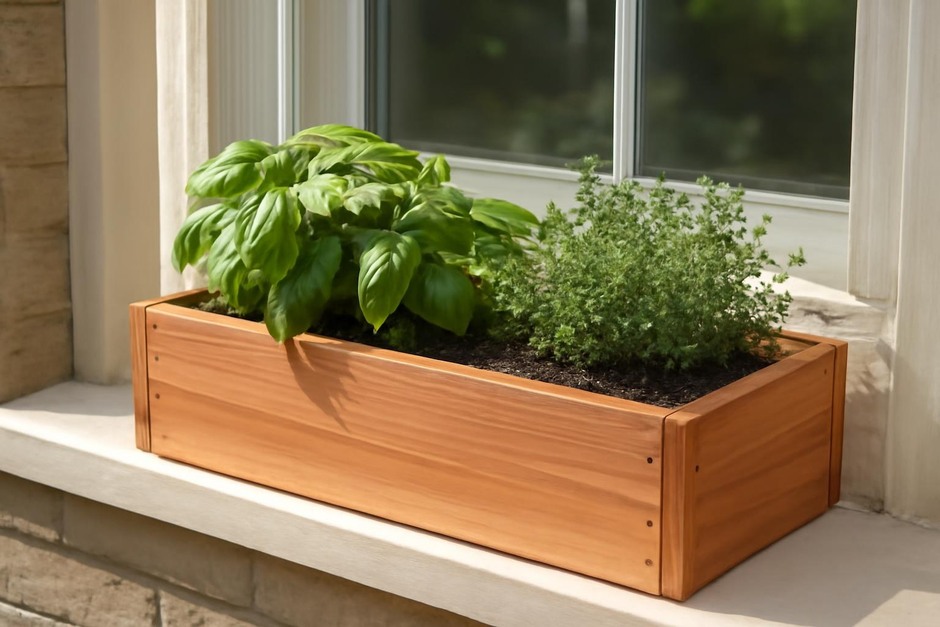
Window herb boxes bring fresh flavors within reach and can be scaled to fit many styles and budgets. This guide compares common materials and methods, then walks through a step-by-step build. Finish with practical variations and troubleshooting to keep plants healthy and the structure sound.
Materials and trade-offs
Choose a material based on durability, weight, appearance, cost, and maintenance. The choices below summarize trade-offs to inform the method you’ll follow.
- Cedar (or other rot-resistant softwood): Naturally durable outdoors, attractive grain, moderate weight. Requires little maintenance but will weather to a silver patina unless finished. Good thermal properties for roots.
- Pine or spruce (treated or painted): Lower cost, easy to work, but less rot-resistant unless finished or pressure-treated. Weight is similar to cedar.
- Reclaimed hardwood: Attractive and sustainable if sourced responsibly. May require more effort to square and fasten; condition can vary. Dense woods retain moisture and can be heavier.
- Composite decking material: Low maintenance, very rot-resistant, consistent dimensions. Heavier and more expensive, fewer finishing options for a rustic look.
- Galvanized metal or corten steel: Very durable and modern-looking, thin profile, waterproof by nature. Conducts heat and cold more readily, which can stress roots in extreme temperatures.
- Rot-proof plastic: Lightweight and inexpensive, easy to clean. Can look cheap and retains heat; less compatible with some architectural styles.
Step-by-step method
The following method describes a simple rectangular window box ~24″ long, 8–10″ deep, and 8–10″ tall—suitable for a sill or narrow ledge. Adjust dimensions proportionally for wider or shallower needs.
- Gather materials and tools: For a cedar box, you’ll need four boards for sides (two long sides, two short ends), a bottom panel (slatted or solid), exterior-grade screws or decking nails, waterproof wood glue (optional), a drill/driver, saw, measuring tape, square, sandpaper, exterior finish if desired, weatherproof liner (optional), and mounting hardware (brackets or cleats).
- Cut to size: Cut the two long side boards to 24″ and the two ends to the inside width minus twice the board thickness. If using a slatted bottom, cut slats long enough to fit between the long sides; allow 1/8″ gaps for drainage.
- Assemble the shell: Pre-drill holes to avoid splitting. Apply a bead of exterior wood glue on end joints if desired, then fasten the ends to one long side with countersunk screws. Repeat with the second long side to form a box. Check for squareness and adjust before the glue sets.
- Fit the bottom: Place the bottom panel or slats into the box. If using a solid bottom, drill several drainage holes. Fasten from the outside so screw heads are concealed, or screw upward into the base if mounting on brackets.
- Finish edges and surfaces: Sand exposed edges smooth. Apply an exterior finish only to the outside and top rim if you prefer faster water exchange with the soil; painting or oiling will extend life for softer woods. Avoid finishing the inside if you want the wood to breathe, but be mindful this can reduce longevity.
- Install a liner and drainage: Optional flexible liners can protect wood. If using one, make sure drainage holes are exposed. Add a thin layer of gravel or coarse grit for improved drainage before potting mix.
- Mounting: Choose mounting that matches the weight and exposure. For light boxes on strong sills, a cleat under the box can suffice. For overhangs or masonry, use metal brackets anchored into structure. Allow 1–2″ clearance behind the box for airflow if against a wall to reduce rot risk.
- Plant and water: Use a well-draining potting mix, position herbs according to light, and water until excess drains. Expect to water more frequently than in-ground beds.
Variations
Self-watering insert
Insert a plastic reservoir or repurpose a shallow tub to create a water-storage layer. Trade-offs: reduces watering frequency but adds weight and complexity.
Shallow decorative tray
For windows with shallow sills, build a tray 4–5″ deep. This limits root volume—choose small herbs and accept more frequent watering.
Metal box for a modern look
Use galvanized steel with a wooden trim for insulation. Metal lasts but can overheat; add insulation layer or paint with light color to reduce thermal stress.
Reclaimed wood aesthetic
Work with irregular boards for character. Stabilize thin pieces with a slim plywood backer and use stainless fasteners for longevity.
Troubleshooting and maintenance
- Wood rots at the bottom seams: Improve airflow by adding a rear gap or replace solid bottom with slats. Consider a removable liner so you can dry the box periodically.
- Box sags over time: Increase internal support with a center cleat or use thicker bottom boards. For long spans, add a middle bracket under the box.
- Soil dries too quickly: Add a self-watering insert or increase depth of potting mix. Mulch the surface with coarse grit or small stones to reduce evaporation.
- Plants suffer from heat in metal boxes: Add an insulating layer (thin foam behind the metal) or paint the exterior with a light-reflective color.
- Mounting hardware corrodes: Use stainless or galvanized screws and brackets, and inspect annually. Replace any fasteners that show significant rust.
Deciding between materials and methods comes down to the priorities of appearance, longevity, and maintenance. A cedar box offers a good balance for many home gardeners; composites and metals reduce maintenance but change the look and thermal behavior. With measured cuts, proper drainage, and suitable mounting, a window herb box will provide usable herbs and curb appeal for years.